Shared Online Sessions
Shared Online Sessions allow you to share a WebSurge Session with other users or yourself on other machines without having to copy files or commit and restore in source control. You can create sessions and share a session id that can be picked up by another user using that id.
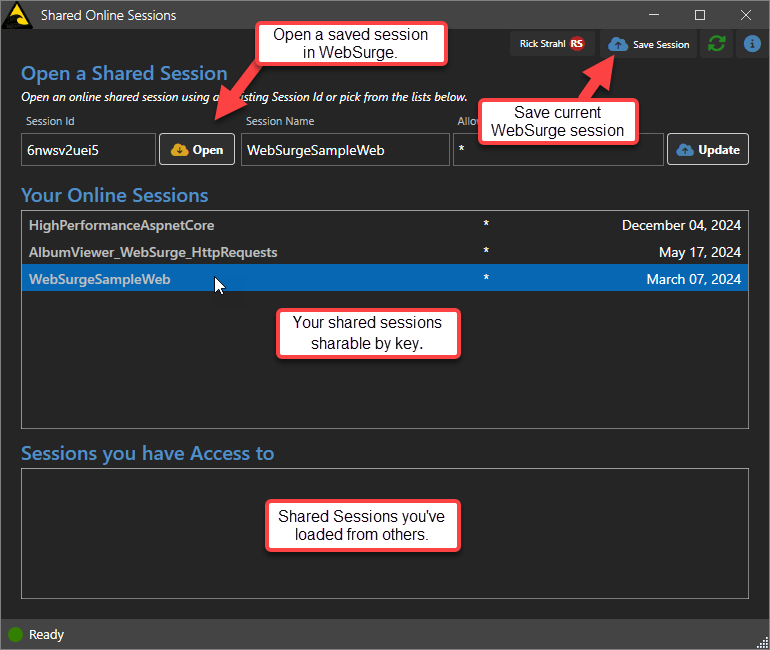
Figure 1 - The main shared online sessions screen shows all available sessions and lets you add new ons
West Wind Account Required
Access to cloud based shared sessions requires a West Wind User Account. Read access is available to all with an account.
For sharing online sessions you need one of the following:
- Free - (1 shared session)
1 shared online session available for users that don't have a WebSurge license.- WebSurge License (2 shared sessions)
If you have a current WebSurge license you get 2 shared online sessions to use- Basic Subscription (10 shared sessions)
10 shared online sessions- Professional (50 shared sessions)
50 shared online sessions
Creating, Sharing, Loading and Updating Online Sessions
The session interface allows you to share sessions, but you can also manage and update them as neeeded.
Creating new Sessions
To create a session:
- Open or Create a regular WebSurge Session with multiple link in the main UI
- Click on the icon to open the Online Session Dialog
- Log in if necessary
- Once in the Online Session Dialog click Save Session
Start by opening the Online Session dialog:
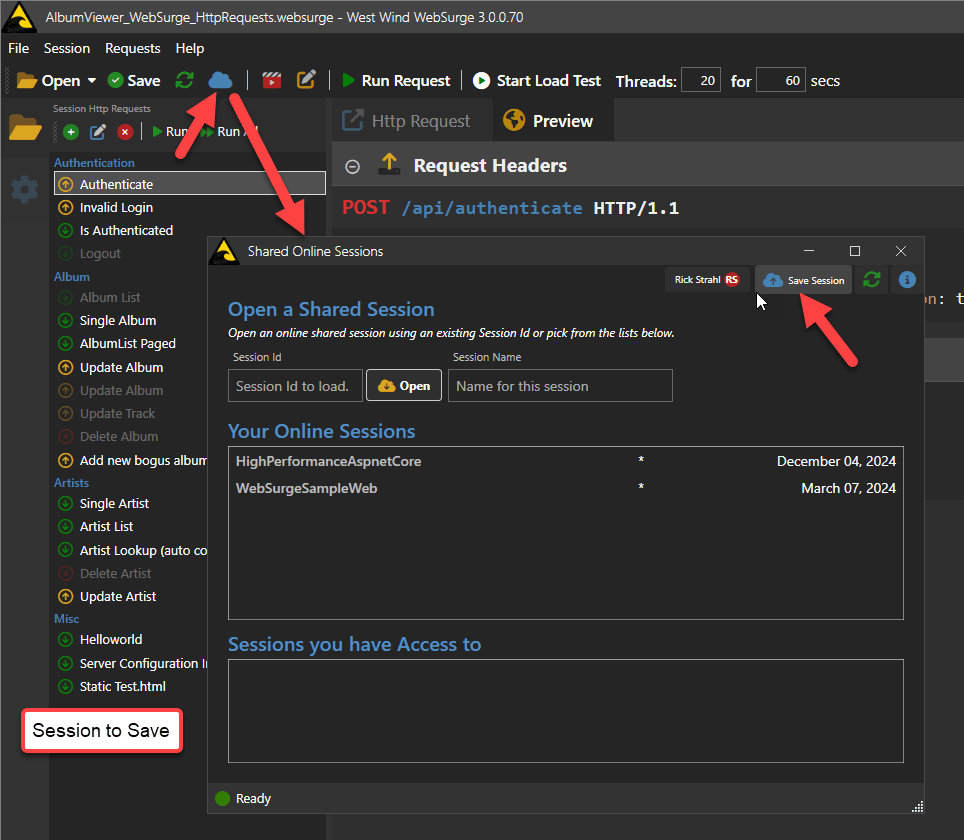 Figure 2 - To save a session click on the Online Session icon
The name should autofill but you can customize as needed, then click save:
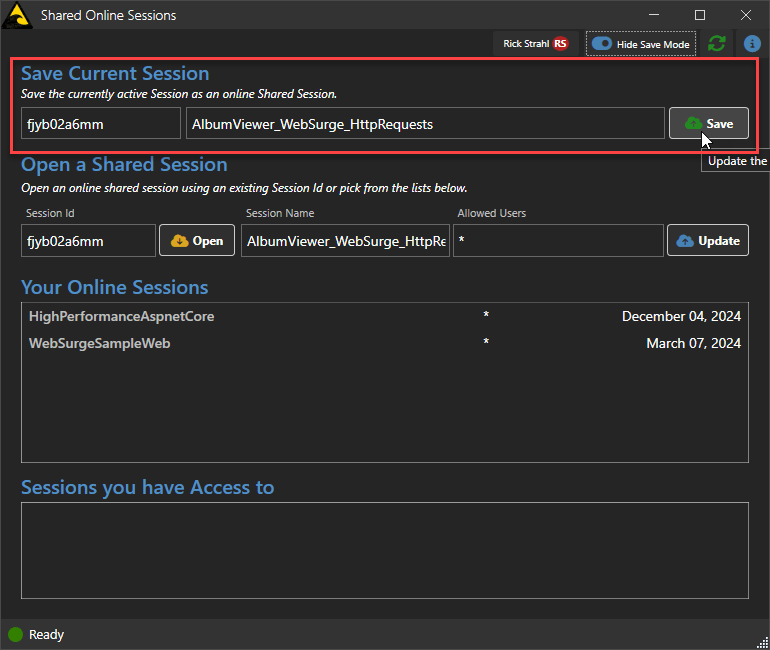 Figure 3 - To actually save give a name and save. It then shows up in the list of online sessions.
Once you've saved, the online session should show up in your list of Online Sessions. The top list shows your own saved sessions, the one below shows any sessions that you have connected to.
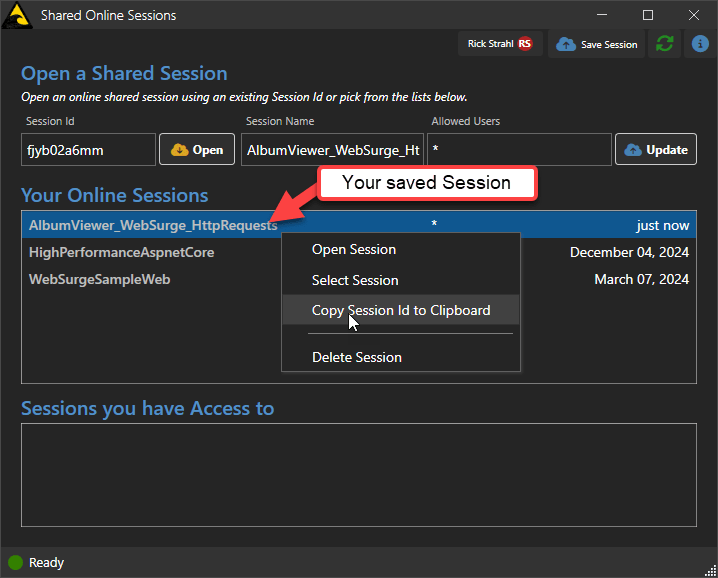
Figure 4 - Once saved, your session shows up in Your Online Sessions and you can share your Id.
Sharing your Online Session Id
To share an online session you share the id of the session. As you can see in Figure 4 you can use the context menu to copy the Id or you can use the input field above the list to copy the Id which displays as a session is highlighted.
Simple share the Id with another user or yourself on another machine to open the session on another machine.
You can also share your Id with specific users, by explicitly entering a comma delimited list of user ids into the Allowed Users list. You can find your user id in the Sign In/Profile screen and share it with specific users you want to share with.
Opening an Online Session
There are two ways to access Online Sessions:
- By entering an Online Session Id
- Or accessing a Shared Session that includes your User Id
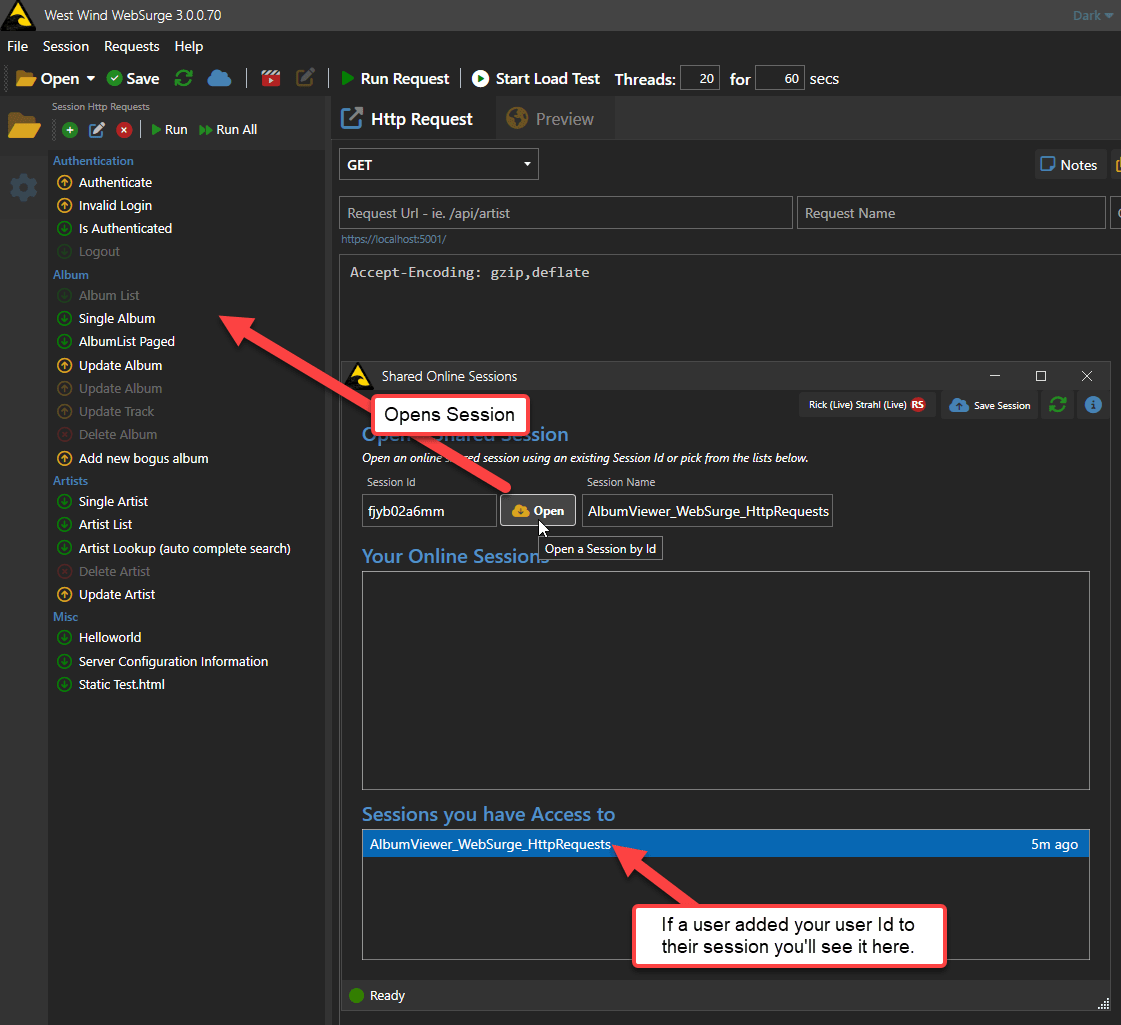
Figure 5 - Open a session either by typing an Id, or by accessing a session you were added to by User Id
In either case click the open button and the session will open in your local WebSurge editor.
Save Your Open Project First
Make sure you save your existing WebSurge project as the existing session is closed before opening the online session.
Once the session is loaded you can do as you can with any other session. You can save it to a local file and use it from disk now without loading it from online again.
Saving Changes to your Online Session
If you are the author of the session you can also update the session with any changes you've made.
To do this click on the Save Session button, and then press the Save button.
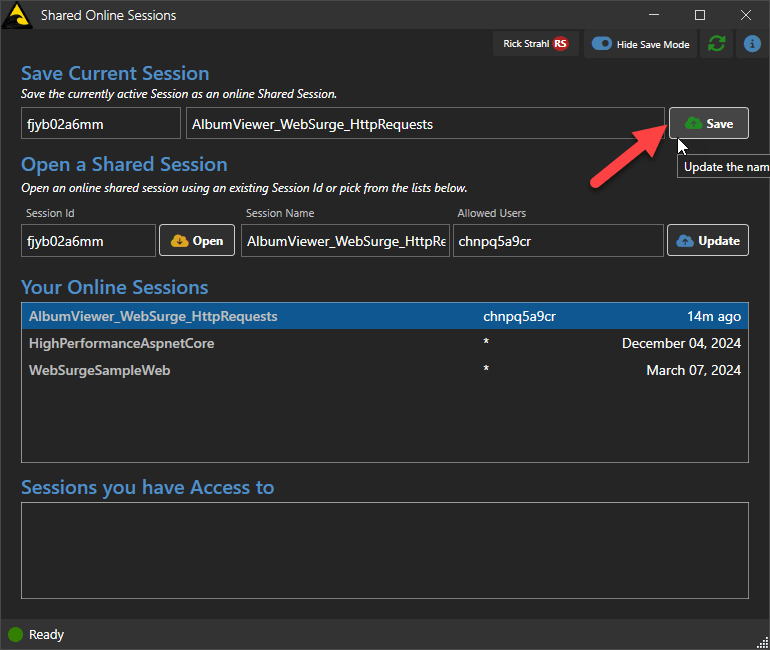
Figure 5 - You can update your own sessions by using the Save Session button
Signing In to your West Wind Account
In order to use shared sessions you need to sign in to a West Wind account in our Web Store. Your profile is the key to tracking your saved online sessions and - optionally - your subscription.
Start by either clicking the icon in the toolbar or File → Online Sessions. If you're not logged in you're prompted:
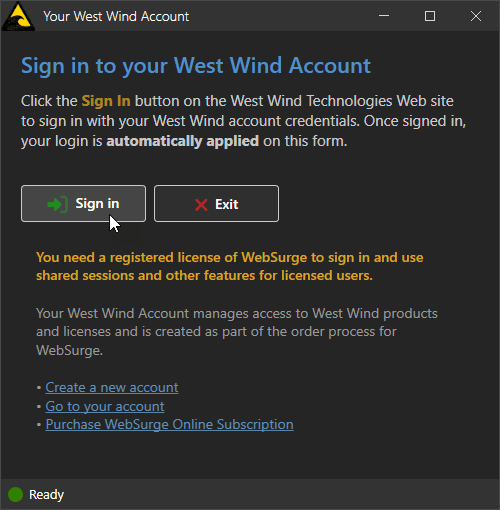
Figure 6 - In order to use online sessions you need to sign into to your West Wind account or create one.
If you have an account on the West Wind site and you are already logged in the form will automatically pick up your login and optional subscription information otherwise you'll be sent to the West Wind site to login or create a new account.

Figure 7 - The online log in form: Sign in or create a new account
Once you log in on the West Wind site, the WebSurge signin form automatically picks up the registration information and logs you in to your account.
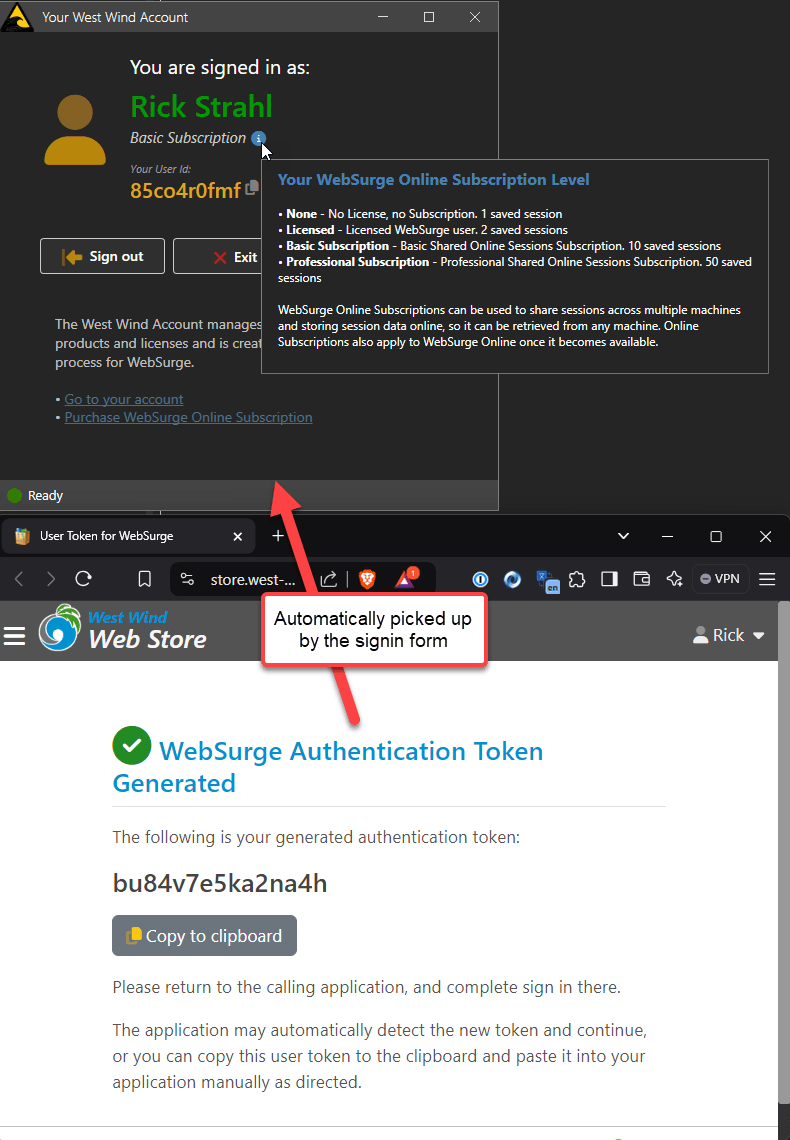
Figure 8 - Once logged in to the West Wind site, the sign is picked up by the WebSurge account form
And you're good to go at this point.