West Wind WebSurge

Http Request and Load Testing made easy
Welcome to West Wind WebSurge.
We believe that testing HTTP requests and load testing a site should be easy. It's something that takes a few minutes to set up and then runs on a regular basis during the development process, so that you can monitor performance of your site while you are building it.
Using this tool you can:
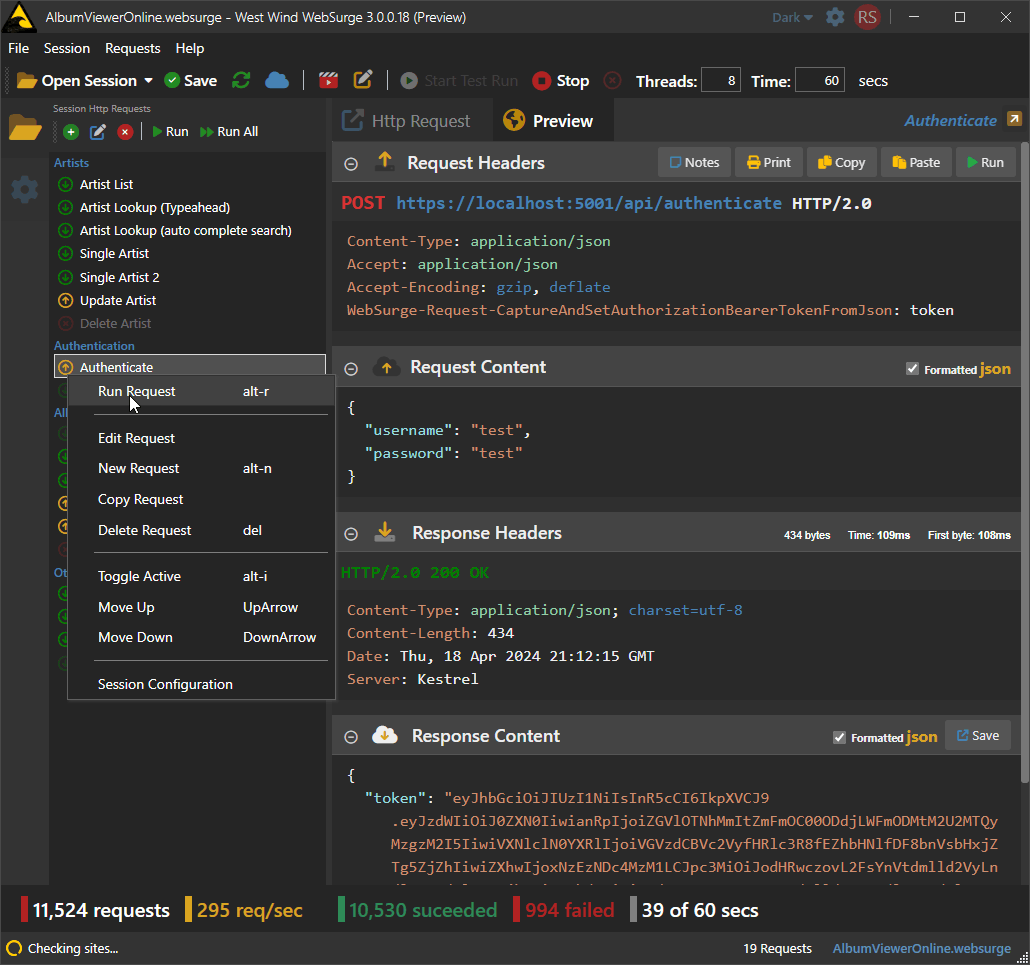
- Create and Capture Http Requests
- Easily play them back individually for API testing
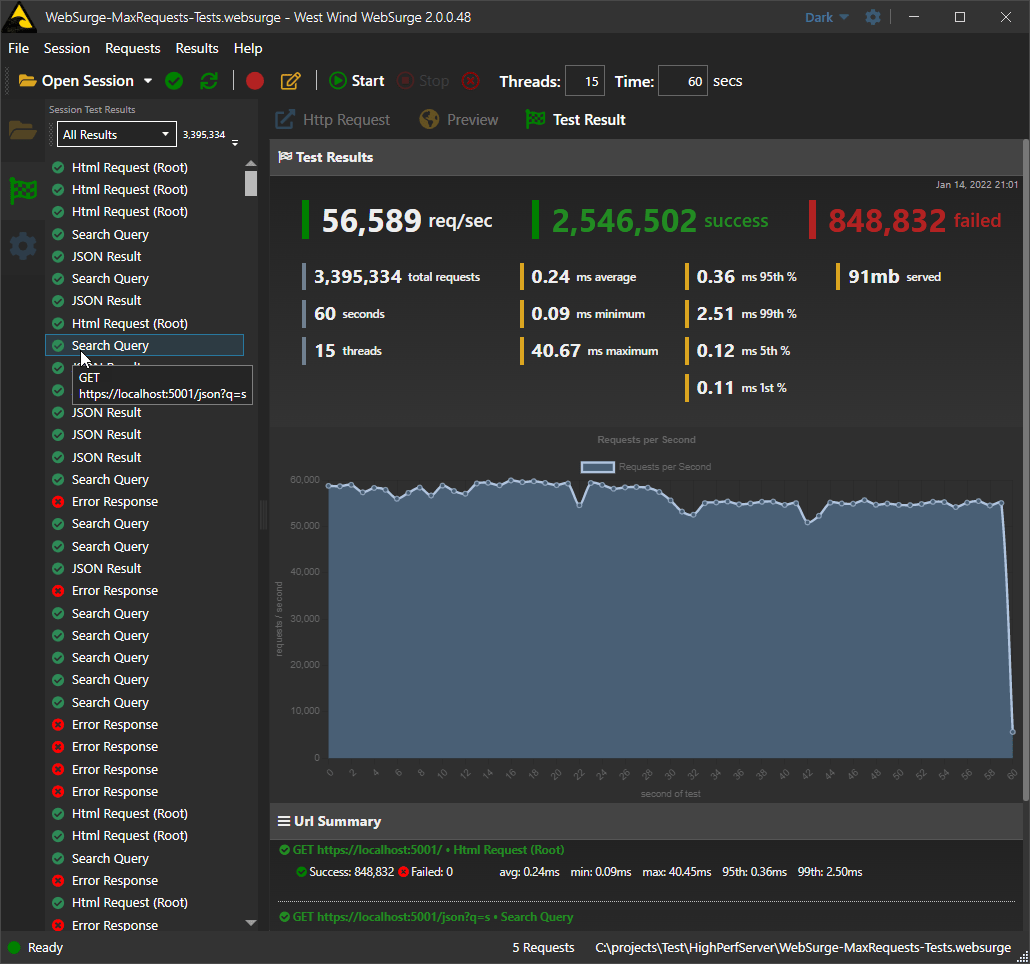
- Easily play them back as a Session under load
- Easily add and edit requests to sessions
It's also easy to get requests into this tool by:
- Manually creating requests using Http Headers
- Capturing requests in a browser session
- Importing requests from OpenAPI or Swagger
- Importing request from Postman and Fiddler

Results are displayed in an easily viewable report screen that shows:
- Summary Report of requests
- Request per second chart over run of test
- Detail information for each URL in the test
The idea of this tool is to be quick and easy to use, so you actually use it regularly. Use it for Postman like API and individual request testing, or use it for automated load testing to test performance and see impacts of changes made in your application easily.